How to Rekey a Kwikset Deadbolt Without Replacing It
Quick Answer: Rekeying a Kwikset deadbolt changes the internal pins inside the lock cylinder so a new key works while the existing lock stays on the door. If the deadbolt is still in good condition, rekeying is usually faster and more affordable than replacing the entire lock. With the right tools, a compatible rekey kit, and careful pin placement, most traditional Kwikset deadbolts can be rekeyed successfully. However, SmartKey models follow a different process that doesn’t require replacing pins.
Why Rekeying Your Kwikset Deadbolt Is Often Better Than Replacing It
Rekeying is the right solution when you want to stop old keys from working without removing a perfectly functional lock.
Unlike replacing the entire deadbolt, rekeying only changes the internal pin configuration inside the lock cylinder. The exterior finish, latch, and door hardware remain exactly the same, making it a practical and cost-effective security upgrade.
In our experience, many homeowners replace their deadbolts unnecessarily when the lock itself is still mechanically sound. If the cylinder rotates smoothly and the deadbolt extends properly, rekeying is often all that’s needed.
When Rekeying Makes the Most Sense
Rekeying is recommended whenever there’s uncertainty about who might still have a copy of your key.
Common situations include moving into a new house, ending a lease with tenants, giving temporary access to contractors, losing your house keys, or purchasing a rental property in Apopka.
One of the easiest ways to avoid rekeying mistakes is by understanding deadbolt lock mechanism before removing the cylinder or replacing the pins. Knowing how the cylinder, plug, and pins interact makes each step easier to follow.
What Happens Inside a Kwikset Deadbolt During Rekeying?
Rekeying works by replacing the bottom pins inside the cylinder so they match the cuts of a different key.
Every traditional Kwikset deadbolt uses a pin tumbler system made up of top pins, bottom pins, springs, and a cylinder plug. These components work together inside the lock cylinder to prevent the plug from turning unless the correct key is inserted.
When the proper key enters the keyway, each pin stack rises until it becomes perfectly flush with the shear line. Once every pin reaches the correct height, the cylinder plug rotates freely, allowing the deadbolt to lock or unlock the door.
Changing the bottom pins changes the key combination without replacing the lock itself. This improves key control, ensuring every previous key immediately becomes unusable.
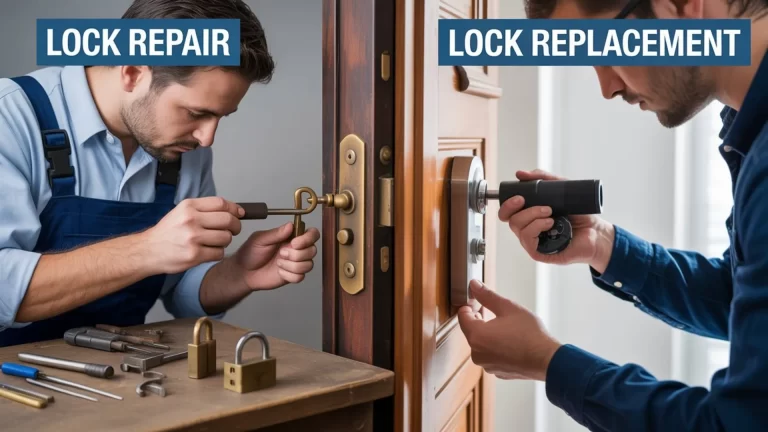
Rekeying vs. Replacing a Deadbolt
Although both options improve security, they solve different problems.
| Feature | Rekeying | Replacing |
| Keeps existing lock | ✔ | ✘ |
| Changes working key | ✔ | ✔ |
| Lower cost | ✔ | ✘ |
| Faster installation | ✔ | ✘ |
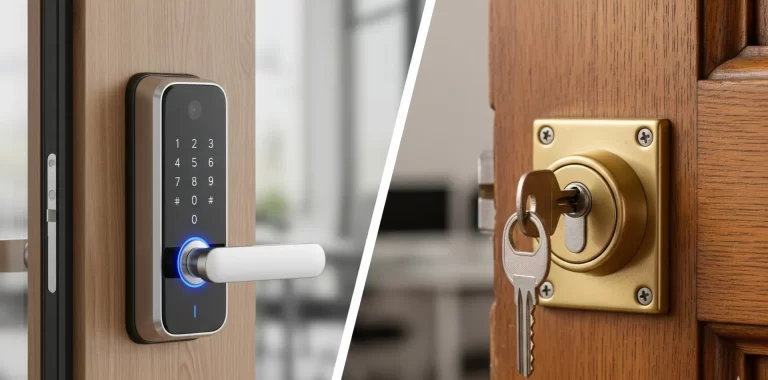
| Upgrades lock style | ✘ | ✔ |
| Improves key control | ✔ | ✔ |
If the lock body is damaged, badly worn, or no longer aligns with the strike plate, replacing the deadbolt is usually the better investment.
Traditional Kwikset Deadbolt vs. Kwikset SmartKey
Before buying a rekey kit, identify which type of Kwikset deadbolt you have because the rekeying procedures are completely different.
Traditional Kwikset deadbolts require disassembling the cylinder assembly, removing the cylinder plug, replacing the bottom pins, and reassembling the lock.
A Kwikset SmartKey deadbolt doesn’t use the traditional pin tumbler design. Instead, it relies on SmartKey technology, a patented sidebar locking system that allows homeowners to change keys using a proprietary learn tool.
Understanding this difference before you begin prevents buying the wrong parts and saves considerable time.
How to Identify a SmartKey Lock
Look for a small oval-shaped slot located next to the keyway.
If your lock includes this slot, it uses the SmartKey system and cannot be rekeyed with a traditional rekey kit.
Traditional Kwikset locks require replacement pin sizes, while SmartKey models simply need the current working key, a new key, and the learning tool supplied by Kwikset.
Tools You’ll Need Before Rekeying Your Kwikset Deadbolt
Using the correct tools makes the process easier and greatly reduces the chance of damaging the lock.
Many DIY failures happen because homeowners use the wrong rekey kit or overlook small components during disassembly.
Essential Tools
| Tool | Purpose |
| Rekey kit | Contains replacement bottom pins and pin chart |
| Working key | Removes the cylinder plug safely |
| New key | Creates the new key combination |
| Plug follower | Holds springs and top pins in place |
| Tweezers | Handles tiny pins accurately |
| Pinning tool | Installs replacement pins |
| Phillips screwdriver | Removes mounting screws |
| Flathead screwdriver | Removes spring cover if needed |
| Slip-joint pliers | Removes the retaining clip |
| Key decoder or depth chart | Matches key cuts with correct pin sizes |
Always purchase a rekey kit designed specifically for Kwikset locks. Different manufacturers use different pin chambers, keyways, and plug dimensions, making universal kits unreliable.
Prepare Your Workspace First
Before removing any part of the deadbolt, prepare a clean and well-lit work surface.
Place a light-colored towel underneath the lock to catch small components like springs, top pins, or the retaining clip if they fall during disassembly. Losing even one small part can prevent the lock from working correctly after reassembly.
Pro Tip: We recommend taking a quick photo of each step before removing additional parts. It makes reassembly much easier, especially if it’s your first time working on a Kwikset deadbolt.
Inspect the Deadbolt Before You Start Rekeying
A quick inspection can save you from spending time rekeying a lock that should actually be replaced.
Begin by inserting the current working key and check whether the deadbolt latch extends and retracts smoothly. The thumb-turn should rotate without excessive resistance, and the lock assembly should feel secure against the door.
If the key sticks repeatedly, the strike plate is badly misaligned, or the cylinder feels excessively loose, rekeying may not solve the underlying problem. In those situations, repairing or replacing the hardware is often the safer long-term solution.
If your existing deadbolt has reached the end of its service life or you want to upgrade your home’s security, 24/7 deadbolt locks installation technicians can install a new high-quality lock that matches your security needs without compromising convenience.
Step-by-Step Guide to Rekeying Your Kwikset Deadbolt
Rekeying a traditional Kwikset deadbolt is straightforward when you have the correct tools, the current working key, and a compatible rekey kit.
Always keep the door open during the entire process. If something goes wrong while testing the lock, you won’t risk locking yourself outside.
Step 1 – Remove the Deadbolt From the Door
Begin by using a Phillips screwdriver to remove the mounting screws located on the interior side of the deadbolt.
Separate both halves of the lock assembly carefully and slide the cylinder assembly out of the door. Place every component on your work surface in the same order you removed it.
Step 2 – Remove the Retaining Clip and Tailpiece
Locate the retaining clip on the back of the cylinder.
Using slip-joint pliers or tweezers, carefully remove the clip without bending it. Once removed, slide out the tailpiece and remember its position for reassembly.
A quick photo with your phone can save time if you forget the correct orientation later.
Step 3 – Remove the Cylinder Plug
Insert the existing working key into the lock and rotate it slightly.
While holding the key in position, slowly push the cylinder plug out using the plug follower. The follower keeps the top pins and springs inside the housing, preventing them from falling out.
Avoid forcing the plug if it doesn’t move smoothly. Excess pressure can damage the cylinder.
Step 4 – Replace the Bottom Pins
Turn the plug over and carefully remove the old bottom pins.
Insert the new key into the plug before installing the replacement pins. Using the key decoder or depth chart included with your rekey kit, select the correct pin sizes for each chamber.
Install each replacement pin one at a time using the pinning tool or tweezers.
When every pin is installed correctly, each one should sit perfectly flush with the shear line. Even one incorrect pin can prevent the cylinder from rotating.
Step 5 – Reassemble and Test the Lock
Carefully slide the cylinder plug back into the housing while keeping steady pressure on the plug follower.
Reinstall the tailpiece, retaining clip, and remaining lock components before mounting the deadbolt back onto the door.
Test the new key several times while the door remains open. The key should insert smoothly, rotate freely, and extend the deadbolt without resistance.
Quick Fix: If the new key doesn’t turn after reassembly, don’t immediately assume the lock is damaged. In most cases, one bottom pin is the wrong size or wasn’t installed correctly. Remove the cylinder plug, compare each pin against the depth chart, and verify that every pin sits flush with the shear line.
Common Mistakes That Can Cause Rekeying to Fail
Most rekeying problems happen because of small mistakes rather than defective parts.
Paying attention to each step helps prevent unnecessary frustration and protects the lock from damage.
Mistakes to Avoid
- Purchasing the wrong rekey kit for your Kwikset model.
- Mixing top pins with bottom pins during disassembly.
- Losing small springs or the retaining clip.
- Installing incorrect pin sizes.
- Forgetting the original position of the tailpiece.
- Testing the lock after closing the door.
- Forcing the cylinder plug during reassembly.
Can You Rekey Multiple Kwikset Locks to Work With One Key?
Yes, as long as the locks use compatible Kwikset cylinders, they can usually be rekeyed so one key operates every door.
This is known as a keyed alike setup and is a popular option for homeowners who want the front door, garage entry, and back door to use the same key.
If you’re securing office buildings, retail spaces, or facilities with several access points, commercial rekeying deadbolt lock experts can create organized key systems that provide both convenience and controlled access.
Traditional Rekeying vs. Kwikset SmartKey Rekeying
Although both methods change which key operates the lock, the rekeying process is completely different.
Traditional Kwikset deadbolts require replacing the internal bottom pins.
A Kwikset SmartKey deadbolt uses SmartKey technology, allowing homeowners to reset the lock without removing the cylinder or changing pins.
How SmartKey Rekeying Works
Instead of removing the cylinder, insert the existing working key and rotate it ninety degrees.
Next, insert the proprietary learn tool into the SmartKey slot before removing the original key.
Insert the new key and rotate it back to the starting position. The lock immediately accepts the new key while rejecting the previous one.
The system replaces the traditional pin tumbler mechanism with a patented sidebar locking system, helping many SmartKey models achieve ANSI Grade 1 security ratings while also providing Bump Guard protection against common lock bumping attacks.
When Rekeying Isn’t the Best Solution
Rekeying only changes who can unlock the deadbolt. It doesn’t repair worn or damaged hardware.
If the cylinder is loose, the bolt drags across the strike plate, or internal components have excessive wear, replacing the lock is usually the better long-term investment.
The same applies when upgrading to a high-security lock, adding a restricted keyway, or installing a modern smart lock with advanced access features.
If the deadbolt continues sticking after rekeying, working with a reliable locksmith company can identify problems that aren’t related to the pins, such as door movement, frame alignment, or worn hardware.
DIY Rekeying vs. Hiring a Professional Locksmith
Both options improve security, but the right choice depends on the condition of the lock and your confidence with small mechanical parts.
| DIY Rekeying | Professional Rekeying |
| Lower upfront cost | Faster completion |
| Requires proper tools | No special tools needed |
| Suitable for good-quality locks | Ideal for damaged or worn locks |
| Moderate skill required | Expert inspection included |
| Risk of incorrect pin placement | Accurate pinning and testing |
Homeowners comfortable working with small parts often complete the project successfully.
However, if you’ve misplaced the working key, damaged the cylinder, or own multiple locks that need matching, professional service usually saves both time and frustration.
Pro Tip: Before reinstalling the deadbolt, apply a small amount of graphite lubricant or dry Teflon lubricant inside the keyway.
These lubricants help the cylinder rotate smoothly without attracting dust or debris that can affect long-term performance.
Why Rekeying Is One of the First Security Upgrades After Buying a Home
Rekeying your deadbolt should be one of the first security improvements after moving into a new home.
Even if the previous owner hands over every key they have, there’s no guarantee that extra copies weren’t given to family members, neighbors, contractors, cleaning services, or maintenance companies.
Instead of replacing every lock, rekeying allows you to keep your existing hardware while ensuring only your new key provides access.
How Long Does a Rekeyed Kwikset Deadbolt Last?
A properly rekeyed Kwikset deadbolt can last just as long as a brand-new lock.
Rekeying only changes the internal key combination. It doesn’t reduce the lifespan of the cylinder when the pins are installed correctly and the lock is maintained.
Most residential deadbolts continue operating reliably for many years with occasional cleaning and lubrication.
Simple Maintenance Tips
Keeping your deadbolt clean helps prevent unnecessary wear inside the cylinder.
- Clean your keys before inserting them into the lock.
- Lubricate the keyway once or twice a year with graphite or dry Teflon lubricant.
- Tighten loose mounting screws during routine home maintenance.
- Test the deadbolt occasionally to ensure it extends and retracts smoothly.
- Replace worn or bent keys before they begin damaging the cylinder.
Small maintenance habits can significantly extend the life of both the lock and the new pin configuration.
Signs Your Deadbolt Should Be Replaced Instead of Rekeyed
Rekeying isn’t always the right solution.
If the lock has mechanical damage or excessive wear, replacing it will provide better long-term security and reliability.
Replace the Deadbolt If You Notice These Problems
- The key repeatedly sticks even after lubrication.
- The cylinder feels loose inside the door.
- The deadbolt doesn’t fully extend into the strike plate.
- Internal components show visible wear or corrosion.
- The lock has been forced during a break-in attempt.
- You want to upgrade to higher-security hardware or smart access features.
In situations like these, installing a new deadbolt is often safer than attempting another rekey.
Secure Your Home With Professional Rekeying Services
Rekeying a Kwikset deadbolt is an effective way to improve your home’s security without replacing a lock that’s still in good condition. When performed correctly, it restores key control, protects your property from unauthorized access, and helps extend the life of your existing hardware.
If you’d rather leave the job to an experienced professional or your lock isn’t functioning as it should, All American Locksmith is ready to help. Whether you need your home rekeyed after moving, want all of your locks keyed alike, or need a damaged deadbolt replaced, our mobile locksmiths provide fast and dependable service throughout.
📞 Call All American Locksmith today at (407) 272-6040 to schedule professional deadbolt rekeying or same-day locksmith service you can trust.